Showing posts with label Paper Crafting. Show all posts

Wednesday, April 18, 2012

Making Memories

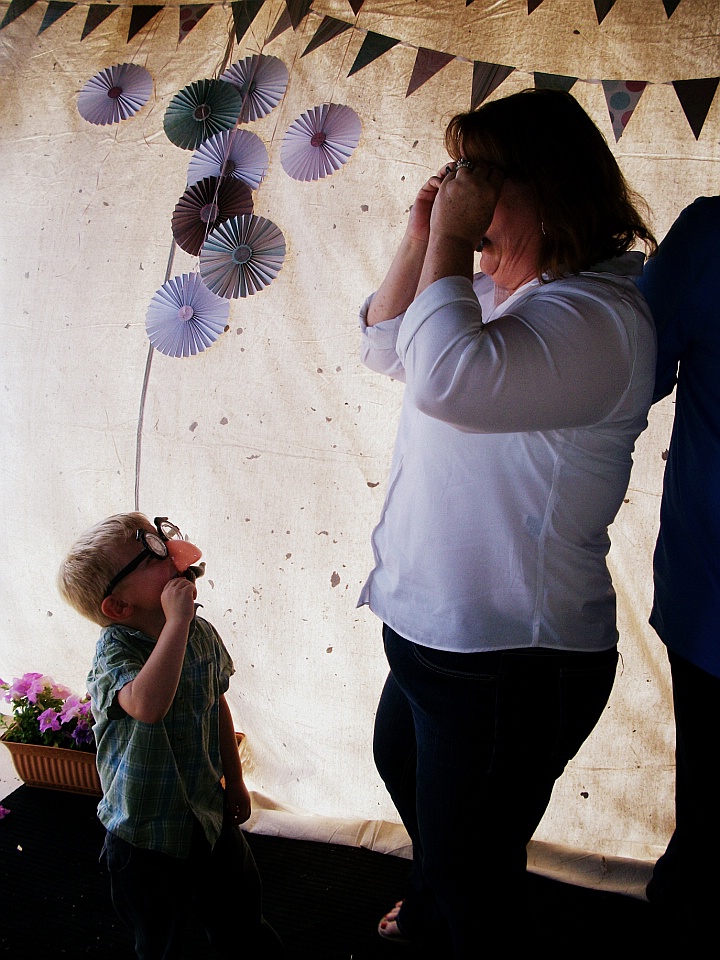
This year for our Easter celebration I decided to make a simple "photo booth" setting.
                  
This was our backdrop.  The fabric is a painting dropcloth.  If you look closely you can see paint splatters on it!  (I used the kind of curtain rings that pinch on to hang the dropcloth.)  I made the paper wheels and bunting out of scrapbook paper.  The bunting is just triangles stitched onto a piece of ribbon.  Over at The Creative Place there is a great tutorial for making the paper wheels.
Everyone had a great time posing! Most of our props came from the dollar store.  I did print a few mustaches and lips from Accent the Party.  They were a free download.


I think he wore these glasses most of the day!


With a little encouragement, even Grandma got in on the action!
I LOVE this picture!
So full of JOY!
We did try for a few "serious" pictures.
My 2 favorite girls and their Grandma.


Sunday, April 15, 2012

Tiffany Blue Theme

I never know where inspiration is going to come from! 
This year for Christmas my daughters bought me my first Tiffany's gift.  (Ooo la la!) Now I don't know about you but if I get anything in one of those pretty blue boxes the box must be saved! It has been sitting around in my bedroom since Christmas.  Makes me smile just to see the box!  On top of that, I keep seeing that commercial where the senior adult man orders Breakfast at Tiffany's for his wife for their anniversary.  Anyway, when it came time to plan "Senior Appreciation Day" at church I had Tiffany on the brain!  My variation of the Tiffany theme is "Breakfast at Trinity".  I started by looking for Tiffany blue paper.  I found a great resource for all types of Tiffany paper at Paper and More online.  They had really fast service.  I had my order in 2 or 3 days.

 My first project was this candy folder.  I came across the idea on Pinterest. (Where all wonderful ideas come from, right?)  You can find the instructions to make this at Kerry's Craft Blog where she even has a great video tutorial on how to put it together.
 This silverware bag is probably my favorite part of this project.  Embossing the bag was also found on Pinterest but their idea was on a paper bag.  I used an embossing folder with tiny dots and ran each bag through my Cuttlebug.  The blue strap and wording squares were made from scraps!  Love finding a way to use scraps!  I had printed the squares for the candy holder and later decided the size was too small.  They were perfect for the silverware bag!
 Invitations were relatively easy to set up.  I downloaded a couple of Tiffany style fonts to use and the chandelier was a die that I have, also with my Cuttlebug.  If you wanted to do it without the die cut, I think it would be fine with just the words in the middle of the invite.  That would be just like a real Tiffany box.  :) The 2 fonts I downloaded are TiffanyTwoLight and TiffanyTwoSmc.  The second one is all capitols and most closely resembles the Tiffany box.

 I ordered 8.5x11 paper from the same place to use as placemats.  Just printed in the center of them.  We will have white tablecloths and candles in the center of the tables.
Like a lot of things I do, it seemed like an easy project until I started making 100 of everything! 

I think this theme would be wonderful for a wedding shower! 

Wednesday, June 15, 2011

Paper Roses - Happy Birthday Grandma!

This weekend we had a family get together to celebrate my mother in law's 85th birthday.  Mom is such a blessing to our family.  We had a great time, laughing, sharing, eating tacos, candy and cake.  Mom's favorite color is blue, her favorite flower is yellow roses and her favorite candy is Turtles. I used those favorites to inspire our decorations.
This was our little favor box.  I found the idea for the paper roses here.  They were so simple to make.
I first cut a piece of cardstock into a 4"x4" square.
The instructions say to cut your square into a circle.  I found that it didn't have to be perfectly round so I just rounded the corners.
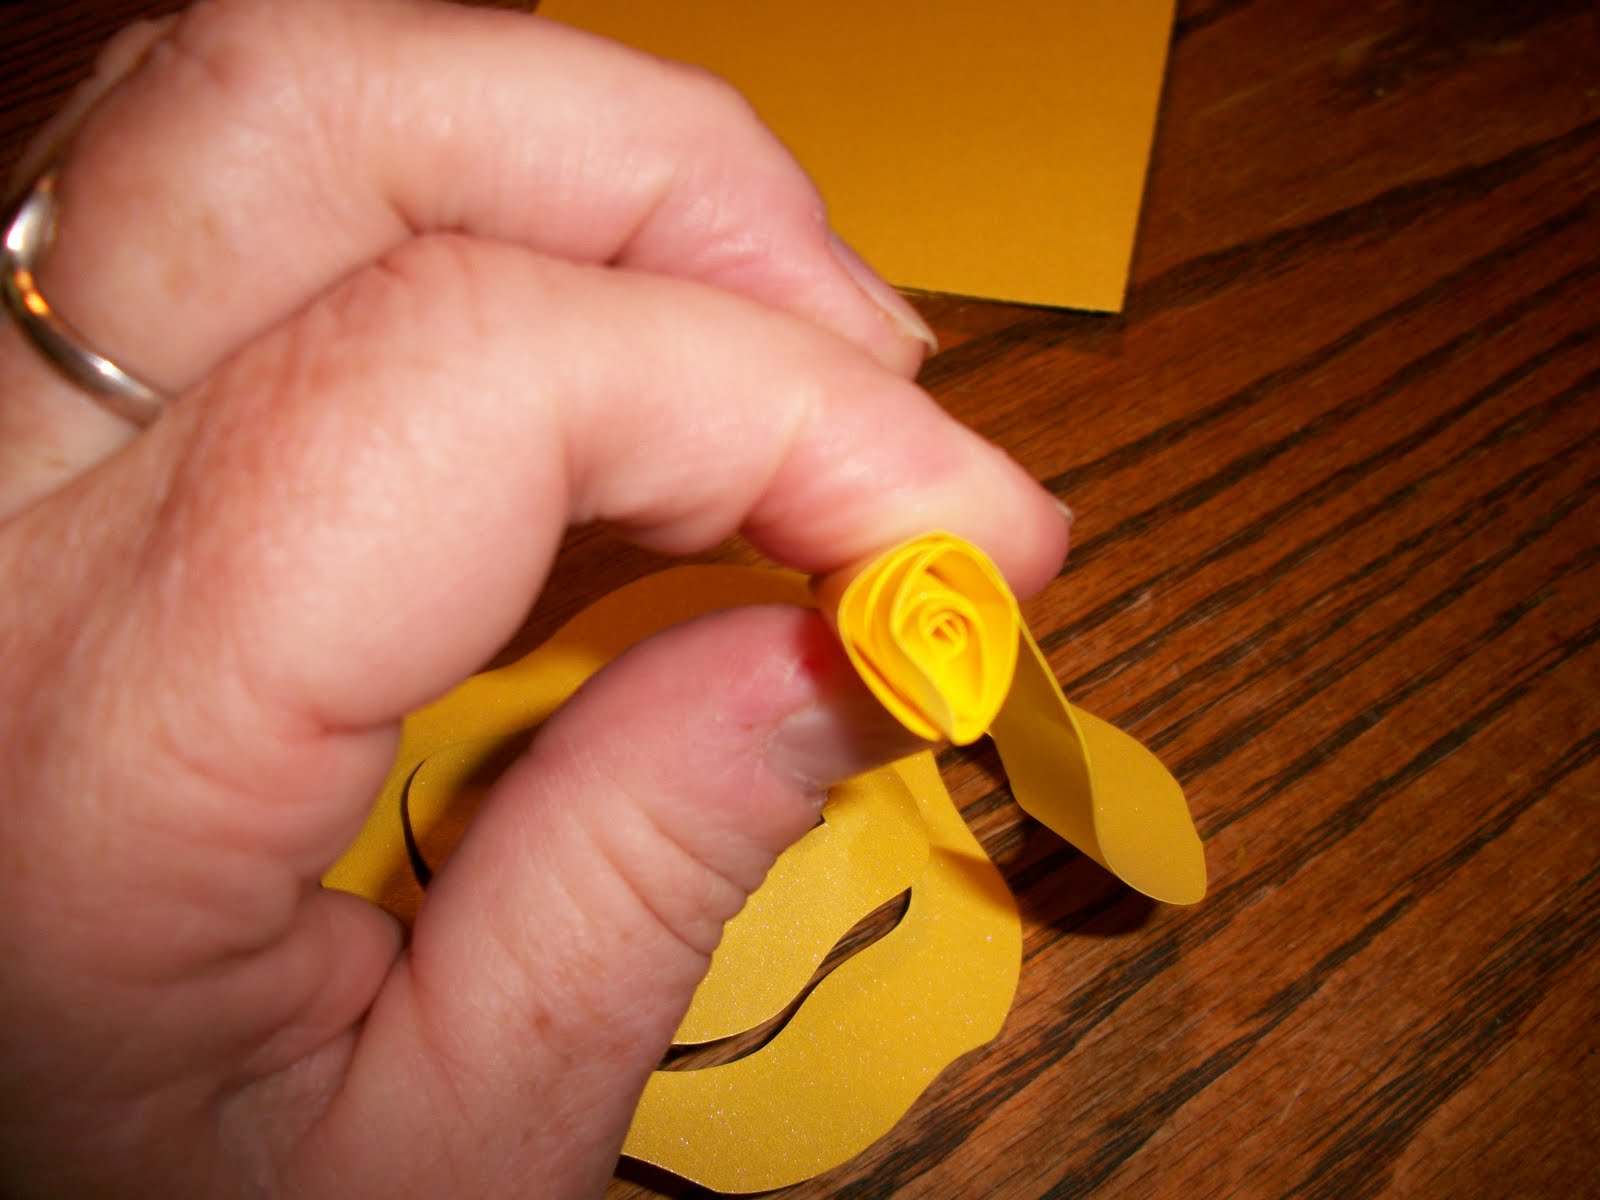
The petals look best if you cut your "round" kind of squiggly.

Starting from the outside cut your circle into a spiral, continuing to squiggle the line.  (How is that for technical terminology?)
Starting from the outside roll into a tight coil. 
Rolling tightly like this will help hold the shape of your flower.
Gently let the swirl/flower loosen in your hand.  It is fun to watch it become a flower.  :)
In the beginning I used my glue dots to hold the back down.  Eventually I changed to the hot glue gun and I liked it better. 

I have a die cut machine that I used to make leaves but they would be easy to cut out freeform. 

Hot glue flower and leaves on to the favor box.

Again, I used a die cut machine to cut out my boxes.  For this project I just cut out lids.  2 lids together were just right to hold one Turtle.


The small candy wrappers are printed on a regular address label.  Very easy to design and they fit a Hershey's Nugget just right.
Happy Happy Birthday to my sweet Mother in law!

Thursday, March 31, 2011

Graduation Tutorial - Cupcake Picks

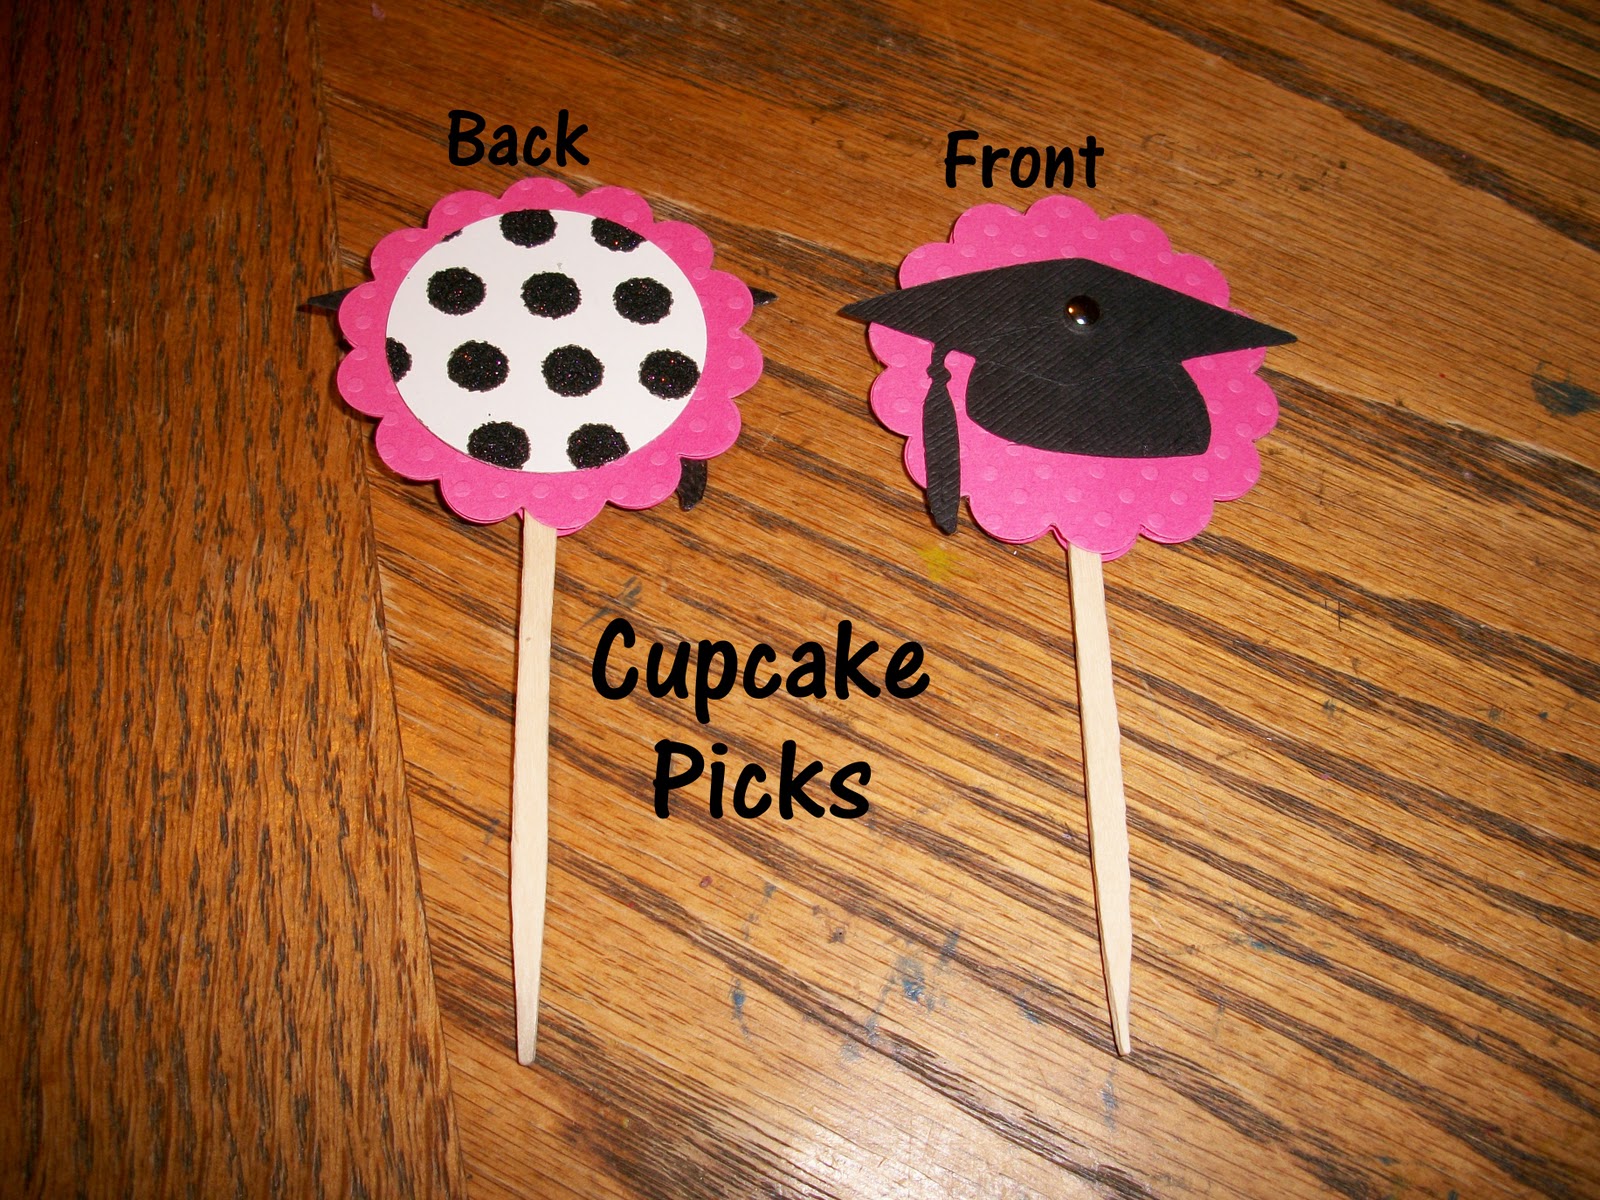
Decorated cupcakes are all the rage these days.  You can find a lot of cupcake picks to purchase online, print and cut yourself.  That is a fine option BUT they really are fun to make on your own!  Here is a tutorial for the graduation picks I am working on.
You will need a couple of craft punches.  My favorite brand is EK Success!  I do a lot of projects in large quantities and I learned the hard way that not all punches hold up over the long haul.  For this project I used the 2 inch scallop and 1.5 inch round punches.
I punched 2 pink scallops and 1 round polka-dot.  I cut out the grad cap using my Cuttlebug.  You could substitue a sticker or another round punch for the grad cap.  You will also need one mini brad and a pick.  The picks I used are a little larger than a toothpick.  I found them in the craft section. 
For this project I used double stick tape as my adhesive instead of using my sticker maker.  Wanted you to see both options.  I usually just do an "X" of tape on the back of the round and then stick it onto the pink scallop.

Once your polka dots are on there, turn the scallop over and double stick tape the back.  I use more tape for this side.  Usually 3 pieces.  Also fold a piece of tape over the top of your pick and then place it on the scallop.

Line up your other scallop and sandwich the pick between the 2.  Make sure it's stuck good.
Poke a miniature brad into the top of your grad cap.  You can go ahead and bend out the legs of the brad on the back.  This is just for decoration.

Next, cover your grad cap with double stick tape. 

Stick the grad cap to the blank scallop.

I think these will be really cute at our graduation party! 

Tuesday, March 29, 2011

Graduation Tutorial - Candy Bars

This year we have a double graduation at our house!  Becky graduates from Arizona State University and Katy graduates from high school.  I've been working on a get together to celebrate.  I thought I would share some simple tutorials on what I've been making.

This one is for a candy bar wrapper.  I used the snack size Hershey bars. We are "coloring out of the lines" on design.  The girls have chosen black and white and pink instead of using their school colors for this party.
Here is a picture of the front and back design.

I purchased a set of graduation dies.  I use a Cuttlebug to cut out my shapes but these dies are from Sizzix. Most brands can be used with my Cuttlebug. 

I used the diploma die on the candy bar because it was the perfect size.  Ended up deciding to personalize my diplomas.  It was a challenge to get the wording in the right place!  Basically I created an outline box about the size of the die.  Added text boxes to add the words.  Print and cut about 20 times until you get the words in the right place.  You totally don't have to add names if you don't want to but I think it adds to the project to have it personal.

This is my Cuttlebug.  I love this machine!  I like it because it is totally low tech and that fits with my personality!  You start by laying your die face up on the cutting mat.
Add your paper on top of the die.

Top it with another cutting mat.

Crank it through the machine.

Comes out the other side perfectly cut!
In order to have the bow on my diploma pink, I ran a piece of pink paper big enough to cover the bow section of the die.  It was very easy to clip away the excess and just have the bow.

Next is to wrap the candy bar.  I start by taping back the flaps.  This project was a lot easier when candy bars were wrapped in foil and then paper. 
Next wrap your candy bar in a foil wrapper.  I buy mine pre-cut from foilman.com .  He sells pre-cut sheets in all different colors and specific sizes for different candy bars.  They run about .05 or .06 a sheet.  Basically they are made of paper backed foil like foil giftwrap.  You could buy giftwrap and do it yourself but I like having them all cut out for me. 
Wrap it like a present.  Pull it around the long way first and tape it down.  I usually run my finger along the edge to get a crisp square edge.

Fold the ends up and tape them down as well.

I found this cool sparkly polka dot cardstock and cut pieces to go on the back of the candy bar.  Use double stick tape to hold it down. 

Another one of my favorite gadgets is my Xyron Sticker Maker.  I put both the diploma and the bow through this little gadget and it comes out the other end with sticky on the back!

Peel off the plactic topping and then you can peel off your bow and stick it to the diploma cut out.
Then just peel and stick onto the front of your candy bar. 

I know this seems like a lot of steps for one little candy bar but it's really not so bad.  I usually do it in segments.  (Do all the cutting, wrapping or whatever at once.)  It's a great project while you're watching TV in the evening.