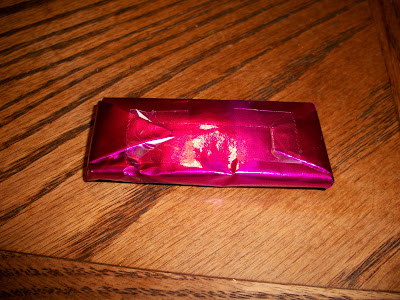
This one is for a candy bar wrapper. I used the snack size Hershey bars. We are "coloring out of the lines" on design. The girls have chosen black and white and pink instead of using their school colors for this party.
Here is a picture of the front and back design.
I purchased a set of graduation dies. I use a Cuttlebug to cut out my shapes but these dies are from Sizzix. Most brands can be used with my Cuttlebug.
I used the diploma die on the candy bar because it was the perfect size. Ended up deciding to personalize my diplomas. It was a challenge to get the wording in the right place! Basically I created an outline box about the size of the die. Added text boxes to add the words. Print and cut about 20 times until you get the words in the right place. You totally don't have to add names if you don't want to but I think it adds to the project to have it personal.
Add your paper on top of the die.
Top it with another cutting mat.
Crank it through the machine.
Comes out the other side perfectly cut!
In order to have the bow on my diploma pink, I ran a piece of pink paper big enough to cover the bow section of the die. It was very easy to clip away the excess and just have the bow.
Next is to wrap the candy bar. I start by taping back the flaps. This project was a lot easier when candy bars were wrapped in foil and then paper. Next wrap your candy bar in a foil wrapper. I buy mine pre-cut from foilman.com . He sells pre-cut sheets in all different colors and specific sizes for different candy bars. They run about .05 or .06 a sheet. Basically they are made of paper backed foil like foil giftwrap. You could buy giftwrap and do it yourself but I like having them all cut out for me.
Wrap it like a present. Pull it around the long way first and tape it down. I usually run my finger along the edge to get a crisp square edge.
Fold the ends up and tape them down as well.
I found this cool sparkly polka dot cardstock and cut pieces to go on the back of the candy bar. Use double stick tape to hold it down.
Another one of my favorite gadgets is my Xyron Sticker Maker. I put both the diploma and the bow through this little gadget and it comes out the other end with sticky on the back!
Peel off the plactic topping and then you can peel off your bow and stick it to the diploma cut out. Then just peel and stick onto the front of your candy bar.
I know this seems like a lot of steps for one little candy bar but it's really not so bad. I usually do it in segments. (Do all the cutting, wrapping or whatever at once.) It's a great project while you're watching TV in the evening.


3 comments:
You are a crafting maniac! And now a "I-have-to-take-pics-of-each-step" crafter! ;)
Great idea Marlene. Hey if you have any ideas for a kindergarten teacher who is about to retire, please email me.
She is such a special lady and my daughter and I both love her.
I want something homemade and something maybe she could use or eat!!
You are the queen of crafting gadgets! I never even heard of these things, let alone used one. The last crafting thing I used was the glue gun. LOL They are probably outdated now.
You are SO crafty. I am still in awe of the cupcake hamburgers, though. In fact, I'm linking to them in tomorrow's post about when I go to prison...LOL
Post a Comment